Learn how to use Microsoft Word to create an image or table with a caption, that stays near the text that references it.
*** Breaking news October 2020: There's now a plug-in implementation of this, with more powerful layout tools. Download it here. ***
As an author, I usually need to put images and tables into my documents. And like millions of others, I use Microsoft Word as my editor of preference, so it's vital to know how to use it well.
Now Word doesn’t claim to rearrange images so as to get the most pleasing layout with images as close as possible to their references. And the other text processing systems I’ve used, such as LaTeX, often don’t achieve it either—whatever they may claim! So given how powerful Word is as a word processor, grammar checker and table editor, how do we use Word constructs to get a good image and table layout?
Actually, it turns out Word has some very powerful layout features. They’re not well-documented, though, and I’ve been looking for years for helpful recipes that use these features for the best. I've not found them, so recently I’ve spent some time researching and experimenting. Based on that, I offer these recipes here.
- Use a textbox to keep the caption with the image or table
- Anchor the textbox at the location that references it, and use suitable magic choices for the ‘Advanced Layout’ options.
- Recreate the Advanced Layout options after copying that textbox or moving it with a mouse.
Using the Instructions
The instructions talk about a ‘column’ of text. If you’re not using text in multiple columns, this just means a normal page of text.
Creating a Text Box for the Caption
Insert tab - Text box - Draw Text Box
Draw a box on the page—a bit bigger than your image or table, though it doesn’t matter as you'll resize it. Then click inside it and add the image or table.
Select the image by clicking with the mouse; or for a table select the entire table using:
[Mac: Menu - Table / Windows: Layout tab - Table group] - Select - Table
and centre it in its paragraph within the text box (Cxx-E). Keep the default text wrapping around the image or table:
Right click - More layout options - Text wrapping - In line with text
Next add the caption. With the item selected as above:
Right click ‘Insert caption...’ .
By convention figure captions go below the image; table captions go above. The caption will have style ‘Caption’. Now Word’s default Caption style seems to have 10pt spacing after it; if that’s too much space for you, change it using:
Home tab - styles pane - Current styles - Caption...
Then [Mac: click on its right-most end / Windows right-click the style], and:
Modify style - Format - Paragraph - Spacing - After
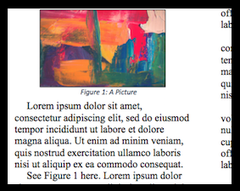
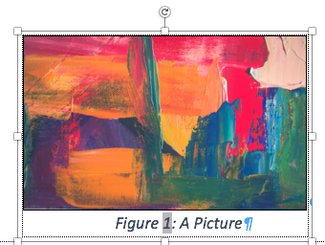
The picture above shows a selected text box with an image and caption.

For borders for a table, select the entire table as above, then use:
[Mac Menu - Format / Windows Home tab - Paragraph group - Borders Icon] - Borders and Shading - Borders
And select the properties you want.
Now resize the text box. Select the box (usually a click on the caption does this), then:
Right click - Format Shape - [Dimensions icon] - Enable: Resize shape to fit text - Disable: Wrap text in shape
I also recommend setting all four margins in that dialog box to something like 0.05 cm. The image here shows the Mac dialog (Windows is similar)
Then remove the text box border:
Right click - Format Shape - [Paint bucket icon] - Line - No line
Now you have a standard text box setup for images or tables. You can copy this and replace the image or table as required. You can even set it as default for the future, using:
Right click - set as default text box
Positioning the Text Box on the Page
This section describes four different ways to position the textbox containing the image or table.


Right click - More layout options - Text wrapping - Unset Lock Anchor.
Then drag the text box to move the anchor to the paragraph where it is referenced; this can be a bit fiddly.
Then Right click - More layout options, and:
Text wrapping: Top and bottom - - Unset Allow Overlap - Set Lock Anchor - Unset Move Object With Text
Set the location using magic as follows:
Position - Horizontal - Alignment - Centered - relative to - Column
Position - Vertical - Alignment - Top [or Bottom] - relative to - Margin
OR to have it half way down a column (some academic paper formats don't allow this):
Position - Vertical - Relative position - 50% [or whatever] - relative to - Margin
The dialog looks as follows on the Mac; the Windows dialog is similar.

If you have wide columns, you may want the image/table on one side or another of the page, with the text flowing around it. Select the text box, Right click - More layout options, then:
Text wrapping - Square - Set Lock Anchor and Move Object With Text. Unset Allow overlap.
Position - Vertical - Absolute position - 0 cm - Below - Paragraph
For an image on the right:
Text wrapping - Wrap Text - Left only
Position - Horizontal - Alignment - Right - Relative to - Column
For an image on the left:
Text wrapping - Wrap Text - Right only
Position - Horizontal - Alignment - Left - Relative to - Column
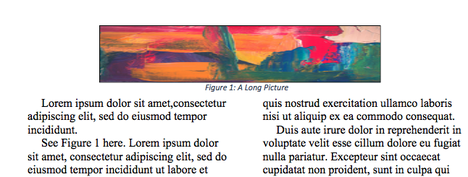
If you have multiple columns, sometimes you’ll want a larger image or table to span all the columns. Normally this would be at the top or bottom of the page where it is referenced, as shown here:
Finally, if you want to have several images or tables together, create a new table within the text box, make its boundaries invisible (as above) and put each of the items, with its caption, in its own table cell. Position the textbox using one of the options above.
Making Changes
If you cut and paste the paragraph with the anchor, the textbox and its contents will come too. But the More layout settings - Position choices will probably be scrambled; reset them as described above.
Word’s textboxes seem to be rather buggy in implementing the ‘Resize shape to fit text’ functionality. If you have problems, I suggest simply resizing the textbox with the mouse.
Finally...
Credit is due to Rob Woodgate for excellent articles on positioning and wrapping text in Word. Take a look at them for more details on what the magic settings mean.
I hope this helps you create more pleasing documents with less effort in future. Please let me know if you find any other good techniques.
- Charles